1. System overview
The VMS records who is visiting, who they are meeting, why they are visiting, the scheduled appointment, actual arrival/departure, approval history and visitor pass.
Before arrival
Parent or staff creates a request. Admin reviews and approves it.
At reception
Reception verifies identity, checks in the visitor and prints a pass.
At departure
Reception scans the pass or enters its number and checks the visitor out.
2. Roles and permissions
| Role | Main purpose | Typical access |
|---|---|---|
| Admin | System owner and approver | All visitors, approvals, users, staff, departments, reports, settings and audit logs. |
| Reception / Security | Daily front-desk operation | Today's visitors, visitor registration, check-in/out, QR/card scan, passes and operational reports. |
| Staff / Teacher | Person being visited | Assigned visitor information and notifications; approval only if enabled by the school. |
| User | Limited internal account | Dashboard and notifications, plus only permissions granted by Admin. |
Every protected page checks permissions on the server. Hiding a menu item is not the security control.
3. Parent or guest booking from home
Open Book an appointment. No staff login is required.
PR-20260908-ABC123.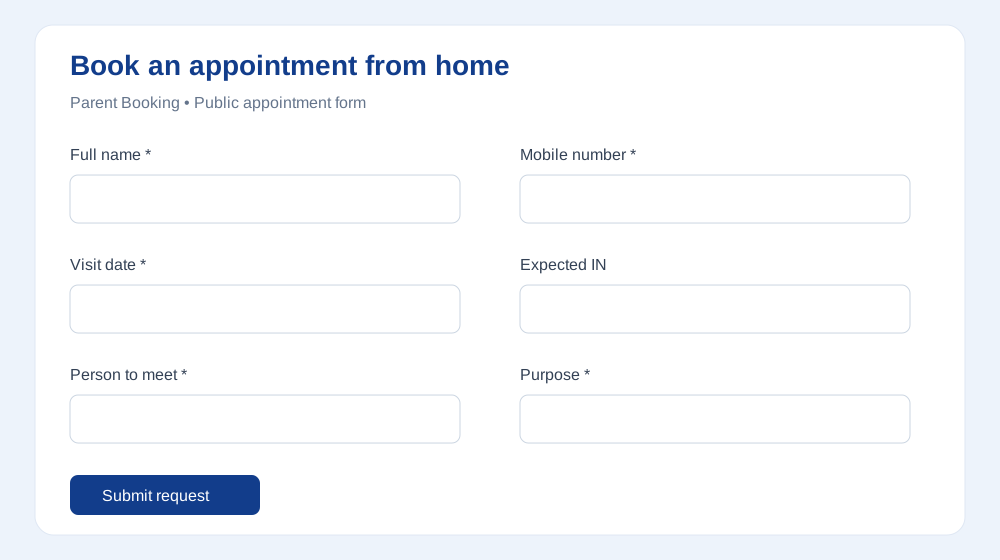
4. Reception and security workflow
- Log in with the Reception account.
- Open Pre-Registrations and confirm the appointment is APPROVED.
- Verify visitor name, mobile, photo/ID according to school policy, person to meet and purpose.
- Open Visitors or the appointment action and select Check-in.
- The system records actual IN time on the server and creates a unique visitor pass.
- Print the pass and give it to the visitor. The visitor wears/displays it while inside.
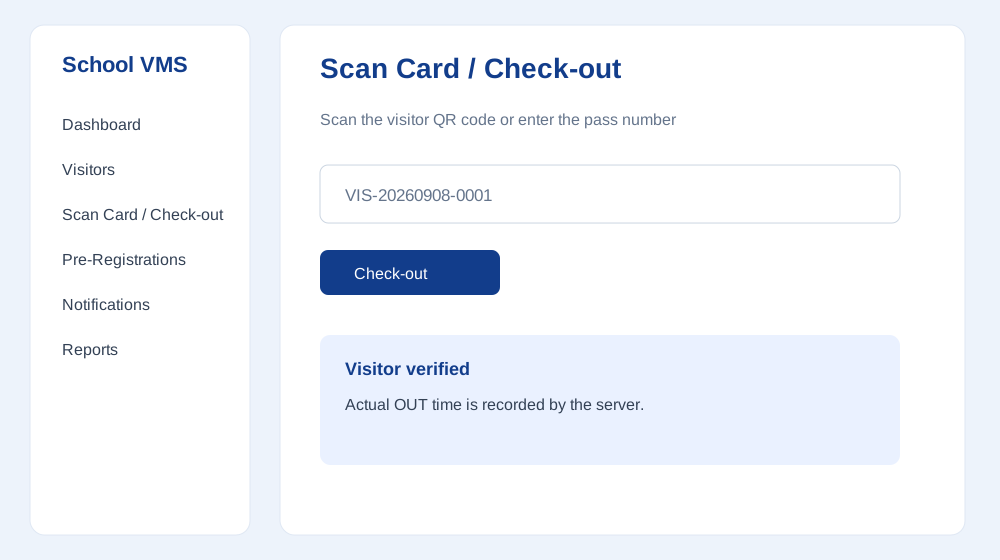
- When leaving, open Scan Card / Check-out, allow camera access, scan the QR code or type the pass number.
- Confirm the visitor and complete checkout. The system records actual OUT time and changes status to CHECKED_OUT.
5. Admin approval and control
6. Staff or teacher workflow
- Log in and open Dashboard or Notifications.
- Review visitors scheduled to meet you.
- When a check-in notification arrives, contact reception if the visitor should be escorted or delayed.
- Reception remains responsible for identity verification, pass issue and checkout.
7. Walk-in visitor use case
- Reception searches mobile, name or visitor ID first to avoid duplicates.
- If no record exists, select Register visitor and capture/upload a photo if required.
- Select person to meet, department and purpose.
- Follow school policy: obtain approval before entry when required.
- Check in, print the visitor pass and notify the staff member.
8. Visitor card and QR
- The pass number is unique and identifies the visit, not sensitive ID-proof data.
- The QR code can be scanned from the printed card at exit.
- If camera scanning is unavailable, use a USB QR scanner or type the pass number manually.
- Never allow a visitor to leave without checkout being completed in the system.
- Actual IN/OUT times are server-generated and cannot be changed through appointment editing.
9. Reports, notifications and audit
Admin and permitted Reception users can review visitor history, date ranges, status, department, person visited, current visitors and checkout details. Notifications cover new requests and operational events where the recipient account exists.
Exported reports should be stored securely and shared only with authorised school personnel. Audit Logs answer who created, approved, changed or closed a visit.
10. Deployment and security checklist
- Set the application timezone and confirm date/time display with the school.
- Document the accepted local phone-number format and validation rules.
- Run the system over HTTPS on the production domain; camera access requires HTTPS or localhost.
- Use individual accounts, strong passwords and least-privilege roles. Never share the Admin login.
- Define who may view visitor photos, ID details, reports and audit logs.
- Keep visitor photos and personal data protected, backed up and retained only for the school's approved period.
- Display the school's privacy/visitor notice and obtain consent where required by school policy and applicable law.
- Test daily backups, restore procedure, emergency contact process and offline/front-desk fallback.
- Configure email/SMS/WhatsApp providers through environment settings; do not hard-code credentials.
11. Troubleshooting
12. Go-live checklist
| ☐ Timezone and date/time format confirmed | ☐ Admin account secured |
| ☐ Reception/security accounts created | ☐ Staff and departments imported |
| ☐ Public booking URL shared with parents | ☐ Privacy notice approved |
| ☐ Camera/QR tested on reception device | ☐ Printer and pass stock tested |
| ☐ Backup and restore tested | ☐ Emergency/offline procedure documented |